Thursday, October 30, 2014

Nevermore Tree and Printable

Last year, Leigh and I created a Nevermore tree and printable, but things got so crazy that I totally forgot to share it on the blog. And we almost let it get away from us again! The tree was inspired by by a pin we saw by The DIYShowOff and we created the printable in PicMonkey

Edgar Allen Poe, The Raven, Halloween Printable, spooky, Easy Halloween DIY, Nevermore Quoth the Raven


Edgar Allen Poe, The Raven, Halloween Printable, spooky, Easy Halloween DIY, Nevermore Quoth the Raven


We cut the printable to fit in the oval frame that was already hanging in that spot, but it would also look great in a rectangular frame. Couldn't fit the entire poem on it but it has the beginning stanzas.


Edgar Allen Poe, The Raven, Halloween Printable, spooky, Easy Halloween DIY, Nevermore Quoth the Raven


This is the label on the tin bucket holding the tree. You can print it out and cut around the label to use it on your container.

Edgar Allen Poe, The Raven, Halloween Printable, spooky, Easy Halloween DIY, Nevermore Quoth the Raven

Last year, we also used some creepy cloth over the tops of the pictures and I had forgotten all about it until I was writing this post. Have to remember that for next year! The photo at the top is my In-Law's and we spookified them in PicMonkey. They only look like this for Halloween, then this photo moves behind the real photo, although we might just leave it that way this year! Teeheehee!!!


Edgar Allen Poe, The Raven, Halloween Printable, spooky, Easy Halloween DIY, Nevermore Quoth the Raven

Edgar Allen Poe, The Raven, Halloween Printable, spooky, Easy Halloween DIY, Nevermore Quoth the Raven

Might be too late to make your own Nevermore Tree, but there's always next year! Wishing everyone a safe and Happy Halloween!

Photobucket


Monday, October 27, 2014

Easy Halloween Photo Booth Frame

Each year, we try to change up our Halloween Photo Booth and create an easy DIY frame. Last year's Polaroid frame was a big hit so we decided to try another foam core board frame.

photo booth diy, foam core photo booth frame, Dollar Tree, DIY Photo Booth Prop, photo booth prop

It was so easy to make and cost all of about $5. You will need a 22 x 48 piece of foam core and 2 felt spider webs from Dollar Tree. We free handed the frame design with a pencil - Leigh designed it for me since I couldn't seem to come up with anything - and then cut it out with our hot knife from Michaels.  We used a bowl to make the round shapes in the corners for the spider webs.

After we cut out the frame, we painted it with gray craft paint and highlighted it with black and lighter grey. I used a small foam roller to paint the base coat and then just used the tip of the roller to slap on the highlights.

photo booth diy, foam core photo booth frame, Dollar Tree, DIY Photo Booth Prop, photo booth prop

Here's a shot of the spider webs before we glued them to the frame - 


Then just hot glue a web in each corner and trim the edges even with the frame. After the paint dried, the frame warped slightly so we  used two wood dowels taped to the back of the frame with packing tape to keep it flat. That's all there is to it. It took us all of about 45 minutes to design, cut, paint and decorate our frame and everyone loved it!

Including the Zombie Star Wars Crew - 

photo booth diy, foam core photo booth frame, Dollar Tree, DIY Photo Booth Prop, photo booth prop

And our Knight in Shining Armour and his crew!

photo booth diy, foam core photo booth frame, Dollar Tree, DIY Photo Booth Prop, photo booth prop


photo booth diy, foam core photo booth frame, Dollar Tree, DIY Photo Booth Prop, photo booth prop

photo booth diy, foam core photo booth frame, Dollar Tree, DIY Photo Booth Prop, photo booth prop

photo booth diy, foam core photo booth frame, Dollar Tree, DIY Photo Booth Prop, photo booth prop


photo booth diy, foam core photo booth frame, Dollar Tree, DIY Photo Booth Prop, photo booth prop


photo booth diy, foam core photo booth frame, Dollar Tree, DIY Photo Booth Prop, photo booth prop

Our photo booth has quickly become a Halloween Holiday tradition. Everyone loves to strike a pose and our Spider Web frame was the perfect prop for this year's party.

Wishing everyone a Happy Haunted Halloween!

Photobucket

Wednesday, October 22, 2014

Creepy Pumpkin Scarecrow

We have definitely moved out of the "cute" Halloween decorations and over to the "Super Creepy Spooky" decor this year. While looking for decorations to make, we ran across a version of the "Pumpkin King" by the great Tim Burton and decided that we just had to have one of our own.

pumpkin reaper, pumpkin scarecrow, pumpkin king, Halloween DIY, Halloween Decorations, Halloween Yard Decor

It was very easy to make. The body is just tree limbs that we cut and screwed/wired together in a basic t shape. Then we wired the frame onto a metal stake that we had already pounded into the ground. The fabric is a set of sheers that we picked up for $2 at our local thrift shop.  They are just draped over the frame and then raggedy strips were cut out of the front.

pumpkin reaper, pumpkin scarecrow, pumpkin king, Halloween DIY, Halloween Decorations, Halloween Yard Decor

We found a great tutorial by Kloey on Halloween Forum for the head 

Before you start following the tutorial, you will need to carve your pumpkin. We also wanted a light inside of it and used one of the pumpkin lights that you can buy at most discount stores. I think ours came from Walgreens.  Mr. Crafty came up with the idea of putting it in a baggy to protect it from the elements - that's why we keep him around - 'cause he comes up with great ideas like this!


The light is a push light - meaning you push down on the top dome to activate it, so we needed to be able to take it out to turn it on. Here's what we did - 


So far it has worked really well and is pretty easy to pull out the light to turn it off and on.  I did spray paint the back of the bag black so that it would blend in better once the head was done

The only thing that we did differently from Kloey's tutorial is that once the cotton balls were  adhered with Mod Podge, I just spray painted it black instead of putting another coat of Mod Podge on it.  After the black paint dried I painted the orange on with a brush and used a coppery brown to highlight the creases.  Then I spray painted the whole head with acrylic sealer.

pumpkin reaper, pumpkin scarecrow, pumpkin king, Halloween DIY, Halloween Decorations, Halloween Yard Decor

It looks really creepy at night with the orange lights on the bush behind it shining through the cloth and the light in the pumpkin.

Sorry for the poor quality of this photo - took it in the dark with my Iphone - but you can tell what I mean about it looking creepy. Plus you can see the ribs that we put on the frame too.  The chain and the cemetery sign came from the dollar store and add the perfect finishing touch!

pumpkin reaper, pumpkin scarecrow, pumpkin king, Halloween DIY, Halloween Decorations, Halloween Yard Decor

It looks creepy at night and in the daytime too!

pumpkin reaper, pumpkin scarecrow, pumpkin king, Halloween DIY, Halloween Decorations, Halloween Yard Decor

He's right by the front door to greet all our Halloween party guests and Trick-or-Treaters. I think he will be just scary enough for the little ones and grown ups alike.

We hope to be posting pictures of the Halloween party on Sunday along with this year's photo booth frame, so stop back by and check it out.

Happy Haunting!

Photobucket


Sunday, October 19, 2014

Easy Painted Pumpkins

If you live in the Texas Gulf Coast area like we do, you know that you can't carve a pumpkin until maybe the day before Halloween. That makes it tough to have a Jack-O-Lantern for our party which is always the Saturday before Halloween.

But you have to have a Jack-O-Lantern for a Halloween Party......So we painted on Jack's face!


no carve pumpkin, painted pumpkin, Easy Halloween Pumpkin
We will just turn him around and use the back side to turn him in to a Turkey for Thanksgiving - that is if the hot Texas sun doesn't bake him before then!

Here's a link to the templates that we copied  - Pumpkin Template


We used a Sharpie to trace the face on, then filled it inwith 2 coats of black craft paint. 
Quick and easy and very cute!


no carve pumpkin, painted pumpkin, Easy Halloween Pumpkin
It's starting to look like Halloween at our house! How about yours?

Wishing everyone Happy Haunting this week! 


Photobucket

We've linked up to: Monday Funday Nibbles by Nic


Sunday, October 12, 2014

Easy DIY Tomato Cage Ghost

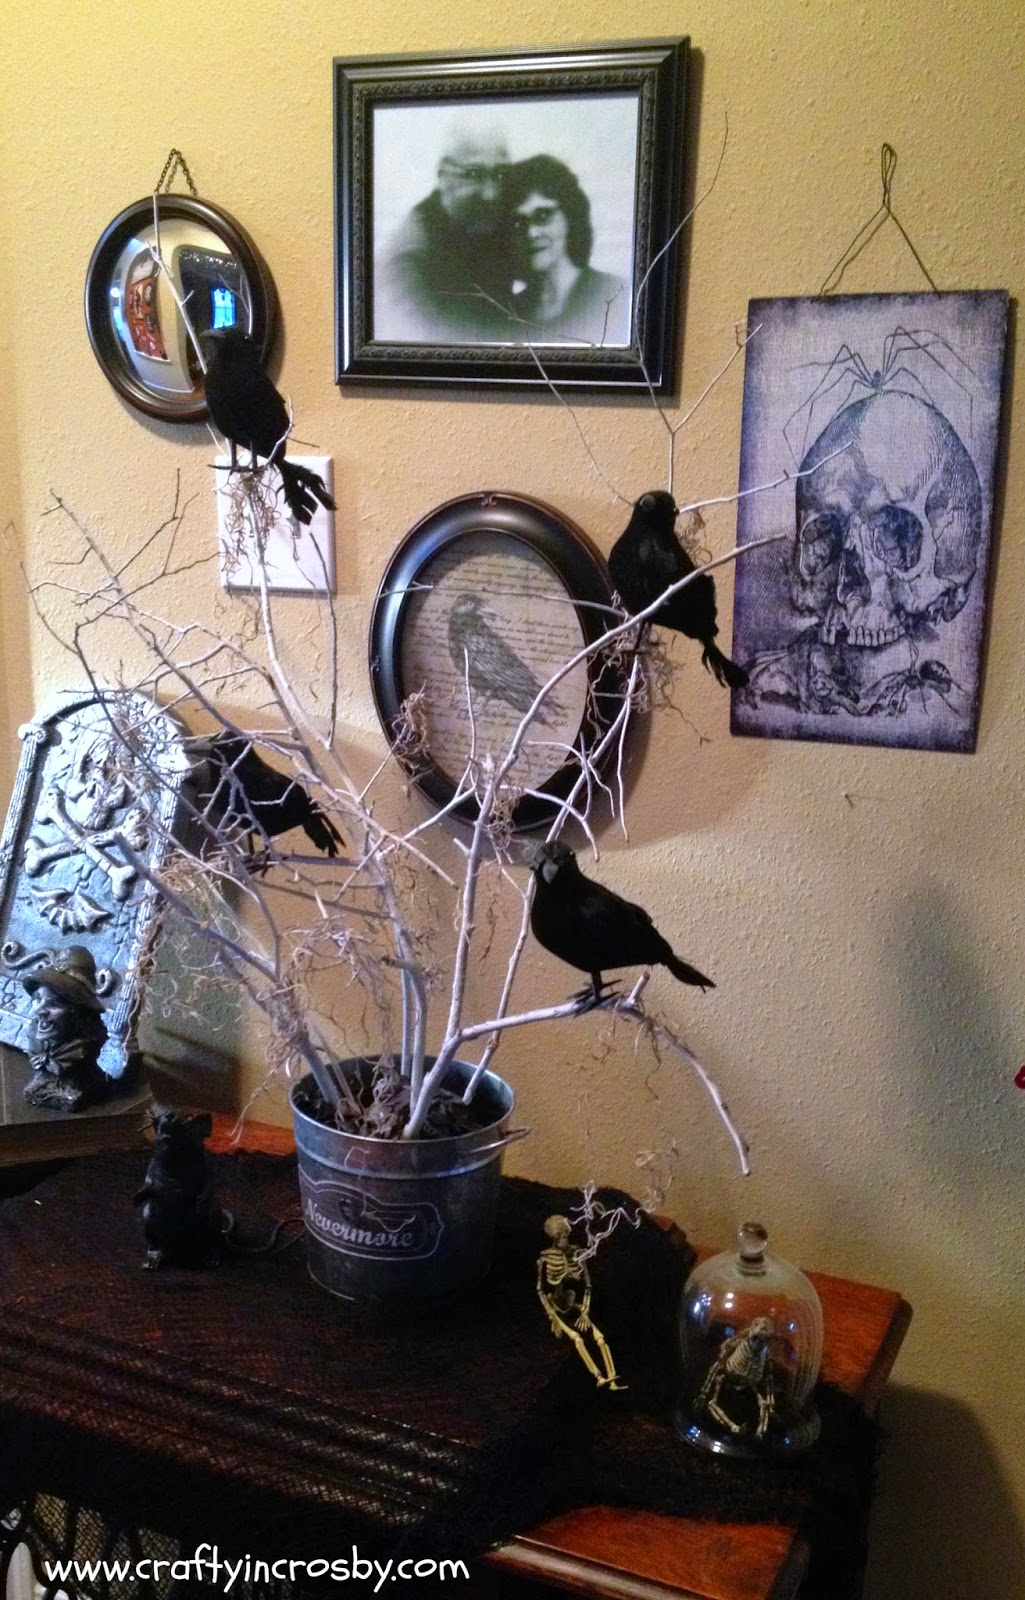
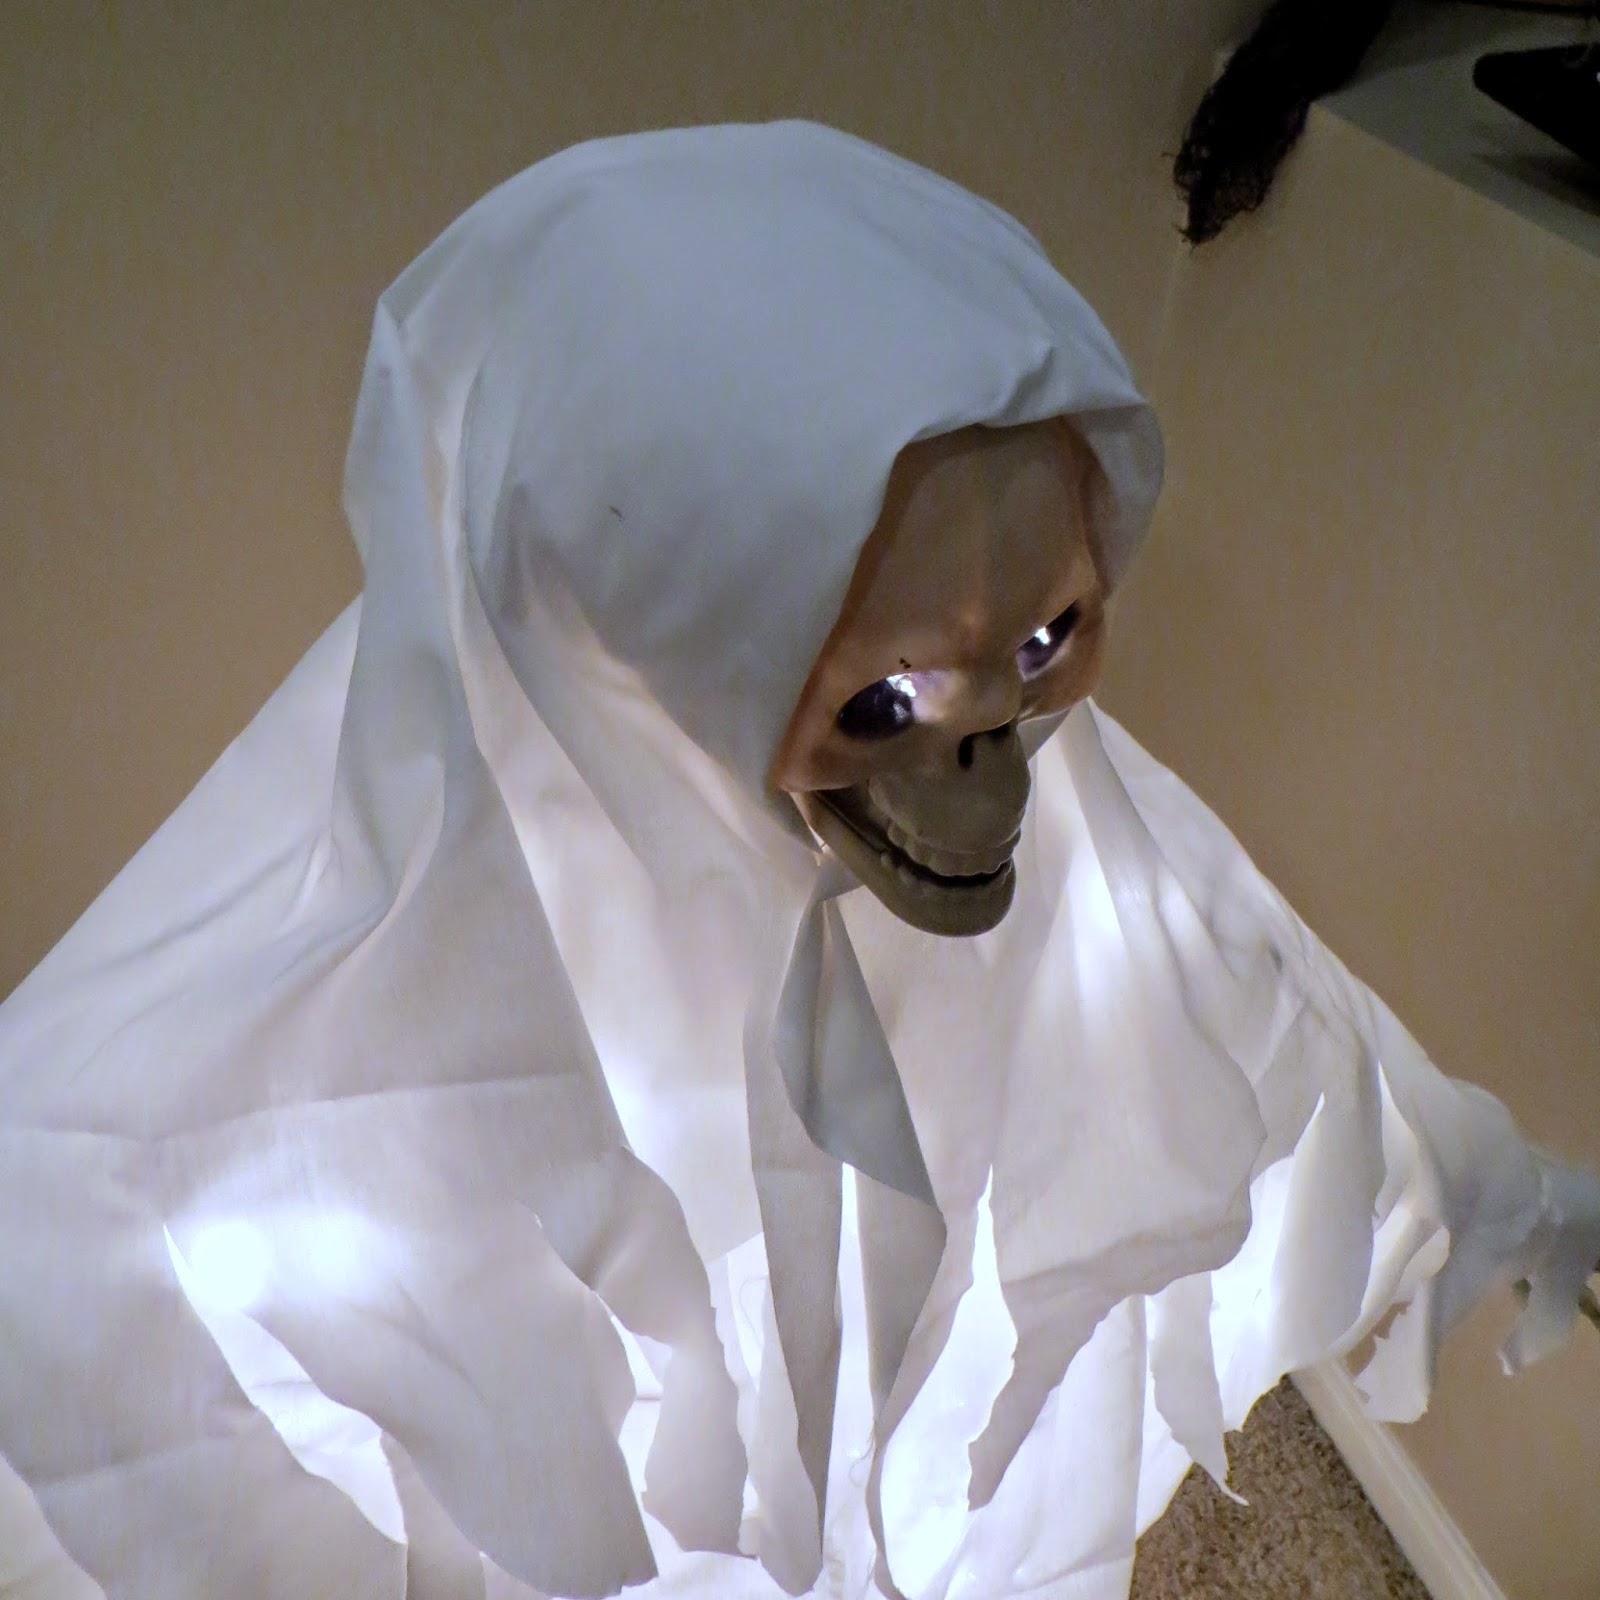
This year, Leigh and I decided to make our Halloween decorations a little bit creepier and scary. So we changed up the plant shelf that overlooks the living room and added a tomato cage ghost. It was incredibly easy to make and I love how spooky it looks.

Spooky Halloween Decorations, creepy Halloween, Halloween DIY, tomato cage ghost, Dollar Tree

I didn't take enough pictures as I was putting it together, so I'll try to explain it step by step. 

Here's what you will need to make your own - 

1. Tomato Cage (I used the small one)
2. White Fabric ( I used 2 pieces about 4'x4' that I cut from a twin sheet)
3. White Christmas Lights (I had a string of icicle lights that worked well, but a regular string 
     would work too)
4. Small piece of quilt batting
5. Dollar Tree Skull and 2 Skeleton Hand Yard Stakes
6. Chicken wire or some type of stiff wire to make the arms
7. Thin wire to attach the arms
8. Safety pins to attach the fabric

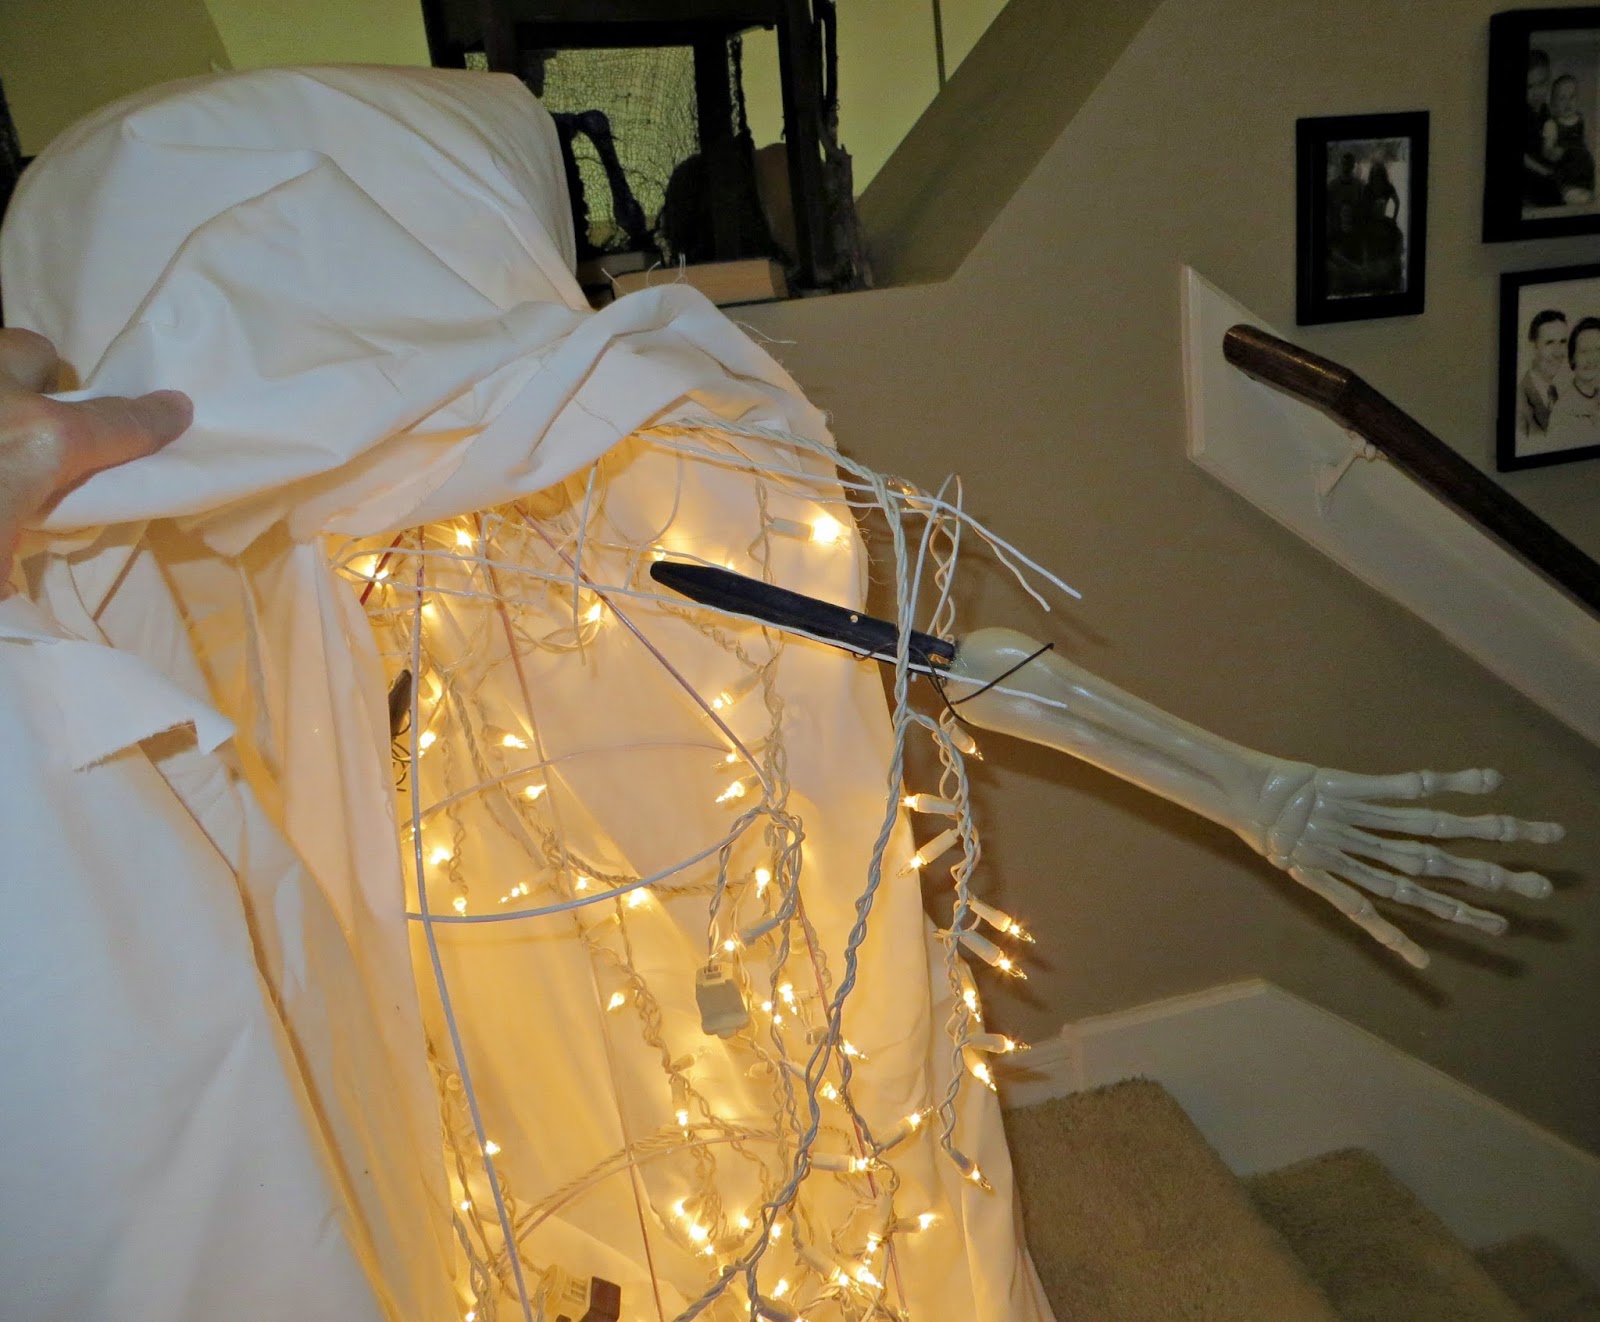
Start by cutting a hole in the bottom of the skull.  We used our handy dandy hot knife from Michaels. If you don't have one, you need to get one immediately! This thing is the bomb! It cuts plastic, foam core board and pumpkins like cutting butter. It is fast becoming my favorite crafting tool.

Use the hot knife to cut small holes in the eye sockets and a hole in the back of the skull so that you can insert the lights.

Gather the three spikes on the tomato cage, twist them together and poke them into the skull. Then make small tubes of chicken wire for the arms. We actually used decorative garden fencing to make the arms for our ghost.  Wire the skeleton hand stakes to the arms. I also put a bit of hot glue on the stake where it is inserted into the hand to make sure that it won't come off. 


Spooky Halloween Decorations, creepy Halloween, Halloween DIY, tomato cage ghost, Dollar Tree

Twine the lights onto the cage and insert individual lights into the eye holes. Wrap the skull with quilt batting to give it a larger head. This also helps the fabric drape nicely.  Wrap one piece of the white fabric around the body and arms of the ghost and secure with safety pins in the back. Then wrap the other piece over the head and safety pin under the chin. We also tattered the edges of this piece.

Spooky Halloween Decorations, creepy Halloween, Halloween DIY, tomato cage ghost, Dollar Tree


This took all of about 30 minutes to throw together and it looks super creepy
 with it's shining eyes and skeleton hands.

Spooky Halloween Decorations, creepy Halloween, Halloween DIY, tomato cage ghost, Dollar Tree

Only 2 weeks until our Halloween party and just 3 weeks until Halloween - can you believe it? Hope that I can get everything on our to do list done by then, but if not, there's always next year!

Happy Haunting!


Photobucket


Thursday, October 2, 2014

Halloween Party Invitation 2014

We will be hosting our annual Halloween Party on the 25th this year and are finally getting the invitations in the mail. I know that in this day of Facebook and email, it is rather old fashioned to send an invitation via the mail, but isn't it nice to actually have something besides junk and bills in your mail box?

Halloween Poem, Halloween Printable, Halloween DIY,  Halloween Party Template

This year's invitation has an original poem that I wrote late one night last month.  I searched and searched for something on the web, but I couldn't find anything that worked, so I sat down and wrote this up. I did borrow the first line from the Bard - hopefully he won't mind!

Double, double toil and trouble;
Fire burn and cauldron bubble.

By the moon we gather here,
To celebrate this time of year.

When witches fly and the dead arise,
The zombies moan with glowing eyes.

We gather round the pumpkin’s light,
And party long into the night.

Witches brew and bat wing stew,
Come taste our punch and cupcakes too.

So disguise yourself and your better half,
Come around about 7 for many a laugh.

We will party long into the night,
‘Till all are blessed with second sight.

I think it works perfectly for a Halloween invitation - what about you?

Halloween Poem, Halloween Printable, Halloween DIY,  Halloween Party Template


Here is a template for you to use - just save it to your computer, open it up in PicMonkey and add your own information.  We inserted ours into a Word Doc and printed them 3 to a page.  You might need to adjust the size a bit, but 3 should fit on it as long as you use narrow margins. After we printed and cut the invitations, we glued them down to a piece of black card stock and added a piece of orange ribbon.

Halloween Poem, Halloween Printable, Halloween DIY,  Halloween Party Template

At a reader's request, I've provided a template without the time.

Halloween Poem, Halloween Printable, Halloween DIY,  Halloween Party Template


Here is the sample so that you can see how we laid everything out - 


Halloween Poem, Halloween Printable, Halloween DIY,  Halloween Party Template


PicMonkey has lots of Halloween fonts to use, so just pick out one you like and add your info for your very own custom invitation.

Halloween is fast approaching and only 28 days to go until our favorite Holiday! Hope you all have a wonderful weekend!


Photobucket


Related Posts Plugin for WordPress, Blogger...