Saturday, September 28, 2013

Halloween Paper Wreath

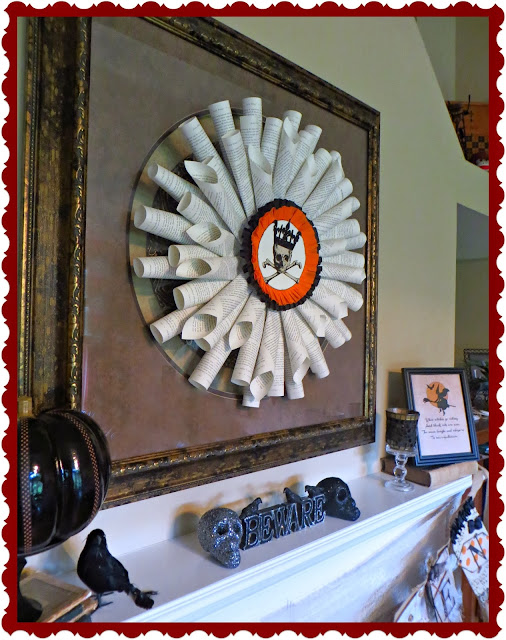
Leigh and Christine had a great time last Saturday making our fantastic Halloween Paper Wreath! We modeled it after one we saw on Pinterest from an Etsy shop named Paper Art Pleasantries by Sizerz. She has some of the most beautiful paper wreaths.

We needed ours to be large enough to fit over our mantel and it took both girls several hours to put it together.  My only contribution was the crepe paper ruffles, they did everything else.

French Paper Wreath, Halloween decorations, paper crafting, skull and crossbones, skeleton


         Didn't they do a fantastic job on it?  We absolutely love it hanging on the mantel.

French Paper Wreath, Halloween decorations, paper crafting, skull and crossbones, skeleton

It was very easy to make and only requires a few supplies - cardstock, tape, hot glue gun, white school glue, foam core (or cardboard circle), small piece of florist foam, an old book, and orange and black crepe paper.

Start by cutting pages out of a book.  Some are rolled and taped with a point and some are rolled and taped without a point.


Using a hot glue gun, glue the rolled paper tubes on to a large foam core (or cardboard) circle. Look at that teamwork - Leigh is cutting book pages and Christine is gluing. 


Then stop to strike a pose for the camera hound, all while artfully holding the glue gun and a paper tube!!!


On to the crepe paper ruffles - start with the orange and glue it on to a paper circle with white school glue.  Pleat the paper as you glue it down.  Once you have the orange ruffle complete, cut a slightly larger paper circle and glue it on to the the back of the orange ruffle.  This will give you a base to attach the black ruffle to.  Glue the black crepe paper to the circle with white school glue and pleat it as you go.  After the black ruffle is complete cut out another paper circle and glue it on to the back to cover the edge of the black ruffle.  This will make it more stable and will protect the crepe paper.


We printed the skull and crossbones out on ecru cardstock, and Leigh cut it out.  The crown we used was a Cricut diecut that was sprayed with spray glue and glittered.  There are lots of crown images on the web, so I'm sure you could find one and cut it out to use. Right click on the skull image and save it to your computer to use for your own wreath or Halloween decorations.  We also used it on our Halloween Banner.  Leigh cut 3 of these out for us - poor thing!


The skull and crown was glued on to a cardstock circle that had inked edges.  I've just gotten to where I hate raw paper edges.  It's a sickness, I know, but I can't seem to stop.  Now Leigh has the sickness too!!!

Once the wreath was complete we needed to raise up the center medallion.  So we cut a small section from a round piece of florist foam and hot glued it to the foam core.  I think it came from Dollar Tree.  We wanted to make sure that the green wouldn't show from behind the medallion, so we wrapped a piece of black crepe paper around the edge.


Then the medallion was glued on top of the foam, and with the addition of a paper clip hanger on the back, the wreath was complete!!!


I was the perfect addition to 2013's Halloween Mantel!!! Thanks so much to Leigh and Christine for crafting up a masterpiece.

French Paper Wreath, Halloween decorations, paper crafting, skull and crossbones, skeleton


Leigh's Dad says it is our new family crest! Smartypants!


Hope everyone had a wonderful and relaxing weekend! Come back soon for more Halloween 2013 projects!

Photobucket


We're on the Fence! Won't you take a minute and vote for us?

Thursday, September 26, 2013

Halloween Mantel 2013

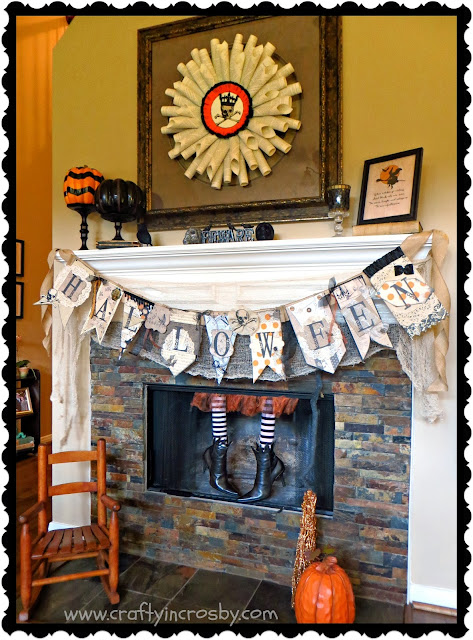
I've finally had a moment to sit down and post pictures of our Halloween mantel this year.  Leigh and I worked like crazy on the new banner, and Leigh and her BFF Christine made the fantastic Skeleton Book Page Wreath. We will post more details on it in October, so come back and check it out.

What do you think?  We just love it!

Halloween Mantel by Crafty In Crosby


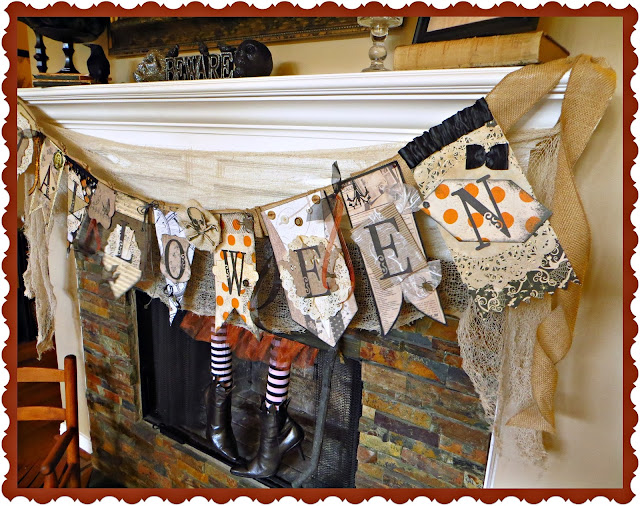
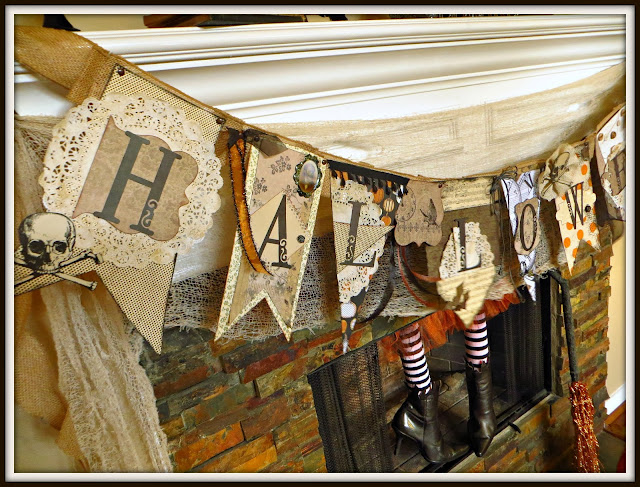
The banner was inspired by the amazing one made by Jen Allyson over at The Project Girl. Ours turned out larger than hers as it was sized for our mantel.  Check out Jen's detailed instructions on her blog.

Halloween Mantel by Crafty In Crosby


Halloween Mantel by Crafty In Crosby


Halloween Mantel by Crafty In Crosby

We used our Fireplace Witch and Halloween Printable from last year, along with some new pieces that we will be blogging about in October.

Halloween Mantel by Crafty In Crosby

Halloween Mantel by Crafty In Crosby

Halloween Mantel by Crafty In Crosby


Leigh wanted things a little more vintage and spooky this year and not so cutesy.  I think that we hit the mark! Most of our decorations this year will have this look. 

Just a few more days and it will be October!  We're getting ready for our favorite holiday


Photobucket

We Linked up to: The CSIProject


We're on the Fence! Won't you take a minute and vote for us?

Sunday, September 22, 2013

Halloween Book Page Art

We are really getting in to the spirit of the season and are busy crafting away for this year's Halloween Blast!  I'm trying to be frugal this year and have been looking for things to make with supplies we already have.  With that in mind, I thought that I would make some new book page art to swap out in place of the year round Book Page Art prints that I made early last year.

Halloween Book Page Art by Crafty In Crosby

Since I'm going as the Wicked Witch and Leigh is going as Glinda the Good Witch, we thought the Flying Monkey print was very appropriate. Leigh's bff, Christine is coming as Dorothy and Leigh's dad is going to be the Tin Man! 

Halloween Book Page Art by Crafty In Crosby

(Don't pay attention to the crooked frame!!! UGH! It's hard enough to get photos of these, with all the glare and poor lighting, and then the frame is crooked!!!!)

I've also included the templates for you to use.  I printed them as 8x10 photos on to regular printer paper to make sure they were centered correctly.  Then I tore out the book page and adhered it on top of the printed page with a glue stick and printed another copy on to the book page.  Then I just popped it in to my 8 1/2 x 11 frames.  So easy and quick!

Halloween Print by Crafty In Crosby

Halloween Print by Crafty In Crosby

Halloween Print by Crafty In Crosby

Halloween Print by Crafty In Crosby


All I need now is a burlap banner on the tree print that says "Spooky". I'm going to try wax paper templates for the letters.  I've seen it on other blogs, but haven't attempted it yet.

Mom suggested that I make some book page prints for Thanksgiving and Christmas too!  Great idea and I'm already thinking up ideas.

Wishing you all a wonderful week!  Stop back in this week for the unveiling of our 2013 Halloween Mantel.  We can't wait to show it off!

Photobucket


We're on the Fence! Won't you take a minute and vote for us?
Tuesday, September 17, 2013

Halloween Pinterest Picks

Ok, Ladies! It's that time again......our Halloween Pinterest Picks are here! We are busily planning our 2nd annual Halloween Bash and have been scouring Pinterest and the web for cool ideas.

You can find all of these at our Halloween Ideas board and our Halloween Treats board.  Some of these are only photos, but most have links to the original source.

Halloween Pinterest Picks via Crafty In Crosby


We are using most of these great ideas this Halloween.  From the Monster Cookies, to the Nevermore tree, we've got big, big plans for this years BASH!

Leigh and I both fell in LOVE with this adorable sign from ArtFire.com


We are in the process of crafting these amazing pumpkins and stands that 
we saw in the GrandinRoad catalog. We'll be sharing them soon!


Spooooky Edible Eyeball Truffles from Disney Pirate Craft - they are made out of Oreo Cookies and Cream Cheese and LOOK delicious! These are on the list of delicacies for the BASH!


This is one of Leigh's absolute favorites by Hostess with the Mostess.


DIY Costume Party Awards by U-Create will be the perfect trophy for the best dressed ghouls and goblins out in Crosby!


This is one of my personal favorites and it is already in progress
using dollar store supplies, of course! Sarah over at Alderberry Hill used thrift store finds for hers.


Who wouldn't love this Witch All Year sign that we
saw out at Old Town Spring last month?


These cookies just make me smile!!! We were fortunate to find the Wilton Candy Eyeballs so that we can make Luna's Gooey Monster Cookies for the party!
We snatched the last 2 packages, lucky us!


This wonderfully spooky DIY Nevermore Tree by The DIY Show Off is also on our to-do list. Such an easy way to help set the spooky mood we are going with this year.


We've already found one thrift store vase to spray 
paint like Room and Style did with theirs!


I couldn't find the original source on this pin, but isn't this little skeleton the cutest?  This is going to be a great addition to the bathroom decor!


And last but not least, we are planning to make one of these for the mantel.  We both love all things book related and think this will look great with the new banner we are making. 


Our Halloween to-do list is mighty long this year! How about you? Big plans?

Many thanks to all of the talented bloggers who have shared their Pinspiration with us! I like to say that I'm not very original, but I'm a great copy cat!

Wishing you all a wonderful week of crafting with your favorite people!

Photobucket


We're on the Fence! Won't you take a minute and vote for us?

Friday, September 13, 2013

Quick and Easy Halloween Candle

We had a new Michaels Arts & Crafts open up on Labor Day weekend and I ended up with a bag of glass gems. They were a grand opening special and I think I only paid $1.50 for the large bag.  Leigh and I took inventory of our Halloween decorations last week and I dumped these in a dollar store vase and thought we might use it this year.

Then I remembered a glass candle holder that I had seen on Pinterest.  So, out came the glue gun and ta-da!

Glass Gem Candle Holder by Crafty In Crosby

It was really easy to do, but did take a bit of time.  Place a dot of hot glue on to the back of a gem and place it on the vase, starting at the bottom.  Press the gem firmly on to the glass and keep on going!


I just loved how it turned out, but thought that it needed a little something more.  So we added a paper skeleton die cut from Michaels. It is just glued on with a couple little dots of hot glue and can easily be removed so that we can use the candle holder all year long.

Spooky Skeleton Glass Gem Candle Holder by Crafty In Crosby

It puts out the coolest shadows on the wall and will be just the right mood setter for our Halloween Party!

If you make one, make sure to get the large bag of glass gems from Michaels.  It took about 2/3 of the bag to cover the vase. This would be a super easy Halloween project to knock out this weekend. We plan to make several more. You can never have enough candles in the house as far as we are concerned.  

We're getting started early this year! How about you? Do you have big plans for our favorite Holiday???


Photobucket


We're on the Fence! Won't you take a minute and vote for us?
 .


Related Posts Plugin for WordPress, Blogger...