Tuesday, November 27, 2012

Christmas Deco Mesh Centerpiece

The ladies at our church always decorate the tables at our annual church Thanksgiving Feast and this year they made the most beautiful Deco Mesh centerpieces with candleholders.  I was so inspired by them that I decided to make a couple for our office Christmas party.  I must admit that mine are quite a bit larger than the ones at church. I wish I had taken a picture of theirs!!!!

Here's my version - (don't look at the crummy candle - I haven't bought new ones for these so I used an old one that I had on hand)

Christmas Decor, Candleholder
 These are very quick and easy to make and if you buy the supplies from Hobby Lobby with a coupon or on sale they aren't too terribly expensive.

Here's what you need -


1 roll 21" red Deco Mesh (got mine from Hobby Lobby for 1/2 price - $5.00 - Takes a little more than 1/2 a roll to make one centerpiece)

1 foam disk - I used the 1 15/16" x 9 7/8" size so that it would be big enough for the glass hurricane

1 roll sheer red/gold ribbon - mine was wired which helped me arrange it to fill in the gaps

1 glass hurricane and candle

1 pine floral pick - mine came from Wal-Mart

1 box of Floral Greening Pins

Directions -

1.  Cut one length of deco mesh the same width as your foam disk


2. Fold the length in two and pin to disk with 4 pins - one on each side


3.  Cut the corners off the Deco Mesh to form a rough circle - this is just so that the green doesn't show through your glass hurricane.


4.  Gather the edge of the roll of Deco Mesh and pin it to the side of the disk


5.  Make 6 Poofs of Deco Mesh around the edge of the disk pinning evenly around the disk.

6. Start the next row of Poofs in the middle of one edge Poof  on the top edge of the disk (does that even make sense to you? Let me know if it doesn't)


7.  Continue making 6 Poofs pinning evenly around the top edge of the disk.  You will end up with 2 rows of  Deco Mesh with 6 Poofs each around the disk.


7.  Cut the sheer ribbon in 2 - 6-7" long pieces with angled edges and pin around the wreath to fill in


8.  Add your floral pick and the glass hurricane and you are done!

Christmas Decor, Candle holder, Deco Mesh


It is really hard to tell how large these are, but they are about 2' in diameter.  This was the first time that I've worked with Deco Mesh and the best thing about it is that you can easily mold it with your hands to achieve the shape you want.


Our First Crafty In Crosby Christmas post!

Now if I can just get my own house decorated!!!  I promised Ty that we would decorate this coming weekend.  So many houses in our neighborhood already have their lights up and I feel like a  Slacker!!

How about you? Have you decorated already? Do you have it all done in a day or does it take you a while like it does me?

Photobucket


Pin It

Saturday, November 24, 2012

Fluffy Pumpkin Cheesecake Pie

This is one of Leigh's favorite holiday pies.  She loves the taste of pumpkin pie but not the texture and this pie is very smooth with a great pumpkin flavor.

The recipe came from a Keebler recipe card that I pulled out of a magazine years ago.  I don't know why they call it "Fluffy" because it has a dense cheesecake texture to it. That being said, it is still a delicious family favorite!


Pumpkin Cheesecake Pie

1 Graham Cracker Crust (I use the 2 extra servings size since this is such a rich pie)
12 oz. cream cheese, softened
1/2 cup sugar
1 1/2 tsp. pumpkin pie spice
1 cup 100% pure pumpkin (1 15 oz can makes 2 pies)
2 eggs

1.  Mix cream cheese, sugar and pumpkin pie spice on medium speed.  Stir in Pumpkin.

2.  Add eggs and mix until blended.  Pour into crust.

3.  Bake at 350° for 40 minutes.  Cool. Refrigerate for 3 hours or overnight.


If you like cheesecake and pumpkin pie, then I guarantee
that you will love this recipe!


Photobucket


Pin It

Wednesday, November 21, 2012

Happy Thanksgiving

Happy Thanksgiving from our Family to yours! 

Wishing you a blessed day with your family and loved ones.

We made a little video about Thanksgiving for you.


Photobucket


Pin It
Tuesday, November 20, 2012

Thanksgiving Mantel - Pine Cone Garland

You all know that I have freely admitted to being a copy cat and here is further proof!!!  Just about my entire Thanksgiving Mantel was "inspired" (sounds so much better than copied) from the following blogs -

A Diamond in the Stuff  (white pumpkins)


and now I've copied Heather at Thrifty Stories beautiful Pine Cone Garland!

Please make sure to visit these amazing blogs and leave them some love!


Heather has an awesome tutorial on her blog and her pictures are so much better than mine.  The only thing I did differently is that I added a little twine bow to the cup hook on each pine cone before I hung it on the ribbon.


It is the finishing touch that I needed and I love all of the natural colors and textures. 


I hope all of these very talented ladies know how very much I was inspired by their beautiful blogs.

We have so many things to be thankful for this year - How about you? What are you thankful for?

Happy Thanksgiving to all!


Photobucket


Pin It

Wednesday, November 14, 2012

Photo Card

Merry Tree Memories Christmas
Turn your favorite photos into personalized Christmas cards.
View the entire collection of cards.

Tuesday, November 13, 2012

Words to live by......

While cruising my favorite addiction tonight, otherwise known as Pinterest,
I found this.......


This so reminds me of my Mom.  The past few weeks have been very difficult for her, but she never seems to fail to show her sunny disposition to everyone she knows. 

She is very much a maker of lemonade (when life gives your lemons) and a glass half full kind of person.  I love and admire her so much and know that she is the reason that I have so many blessings in my life.


Thanks Mom for always being such a positive and sunny influence on everyone you touch!

Photobucket


Pin It
Sunday, November 11, 2012

Thanksgiving Mantel

Well it's a week and a half until Thanksgiving and I finally have all the Halloween decorations put away. Okay, actually, I moved everything upstairs and still have to box it up. But, that's a step in the right direction!

I loved Courtney's mantel at A Diamond in the Stuff so much that I recreated parts of it for my mantel.

Thanksgiving, Mantelscape, Fall, Give Thanks


Courtney placed her GIVE banner on a picture frame, but since I have this
 gi-normous picture on my mantel, I've been forced to place a 
wreath on top of it with my banner.

Thanksgiving, Mantelscape, Fall, Give Thanks


My pumpkins are almost exactly like hers.

Thanksgiving, Mantelscape, Fall, Give Thanks

They started out like this - 


All different colors (from Everythings a $) but the same shape.  I removed the stems,
spray painted the pumpkins cream and the stems brown.
The letters were cut on my Cricut.


On the left side of the mantel I placed an earth tone vase that I picked up from
Home Goods, on clearance of course, for $10.  I just spray painted some branches
 that I picked up on the lot across the street to use in the vase.
(free is always good!)


On the right side of the mantel is my interpretation of Amanda at
Every Creative Endeavor's Give Thanks plate. 

Mine is a clear glass plate from the $ store, that I spray painted brown
and the letters were cut on my Cricut.


$ Store, Cricut, Plate, Thanksgiving, Give Thanks


Thanksgiving, Mantelscape, Fall, Give Thanks


I really love how well the earthy colors look with the stone, but think I will probably add a banner to it.

Hope you had a wonderful weekend!

Photobucket


Covered in Grace

Pin It

Wednesday, November 7, 2012

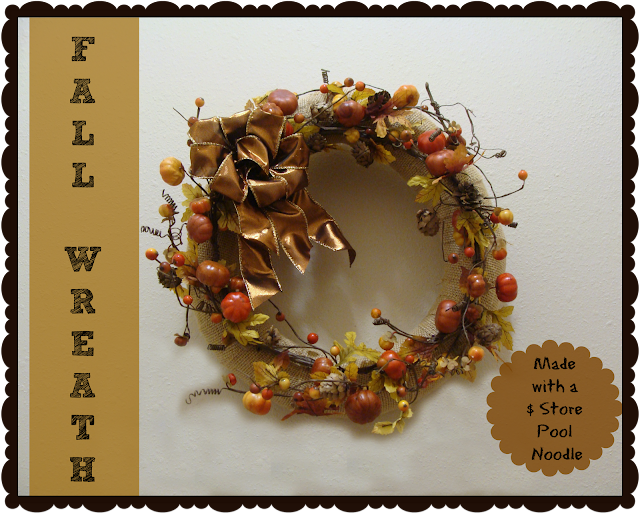
Super Easy Fall Wreath

Leigh and I ran over to Michael's on Sunday and left the boys at home to watch football and do laundry! LOL!  Sounds like a fair trade to me!

While we were there, she said that she would really like to have a wreath similar to the Spider Wreath we made for Halloween, only for Fall.

Here's what we came up with -

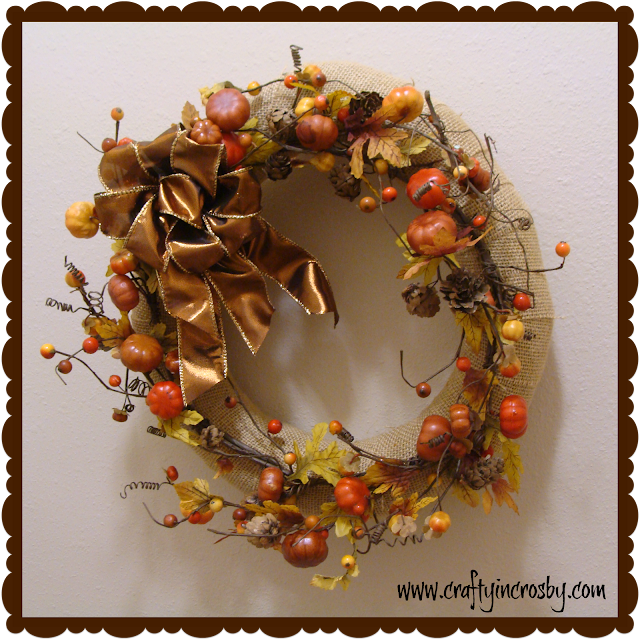
$ Store, Dollar Store, Pool Noodle, Burlap

This wreath took all of about 30 minutes to put together and that 
includes cutting the burlap strips! 

SUPER EASY!

Here's what you need to make your own - 

1. $ Store Pool Noodle
2.  Duct Tape
3.  1/2 yard of burlap cut into 3" strips
4.  Natural vine for decoration (got this for 80% off at Michaels !!)
5.  Bow
6.  Floral Wire/Hot Glue Gun

Step 1 - determine size of wreath, cut pool noodle if necessary (you can use scissors) and join ends with duct tape.

Step 2 - Hot glue strips around wreath

Step 3 - Hot glue vine onto top of wreath

Step 4 - Make Bow and wire onto vine

Step 5 - Add small wire loop to the back for hanging

And that's it!  Here's a view from the top so you can see the strips of burlap - 

$ Store, Dollar Store, Pool Noodle, Burlap

I really love the rustic simplicity and also the cheap factor!  Gotta Love the $ Store!!!

$ Store, Dollar Store, Pool Noodle, Burlap

I had to steal one of the pool noodles that we were using this summer to make this wreath! Oh, well, I figure that I can make 3 more wreaths by the time they start selling the noodles again at the dollar store.

2 weeks until Thanksgiving!! I have to get all the Halloween decorations down or else it's going to be a Halloweenie Thanksgiving in Crosby!!!

Photobucket


Pin It

Saturday, November 3, 2012

Pinterest Picks - Thanksgiving

Can you believe it's November already?  Just 19 days until Thanksgiving and I haven't taken down my Halloween decorations yet!!!!

We have so much to be thankful for this year - our health, home, loved ones and so much more. And to help me get in the mood, I've put together some of my favorite Thanksgiving Pins.

Thanksgiving


Don't you love the Autumn Angel by Crafty Journal ?  
Mom is going to make this one with Ty's Sunday School class. 
I think several of them would look great as a garland.


Kimberly at A Night Owl created this beautifully simple printable.


What a beautiful apothecary jar Yvonne over at Style Burb put together!
 I've got to find a jar like this for my mantel.


Another one of my favorites by Kimberly at A Night Owl blog.  
She sewed leaves from the $ Store into a festive fall garland.


Jill over at Create Craft Love has an easy tutorial for this very cute gobbler.
I think I'm going to make one but maybe use twine instead of yarn?
I just bought a big ball of it and might try it out on this one.


I adore this beautiful mantel created by Courtney at A Diamond in the Stuff  
The beautiful textures and shades of cream and brown that
she used just look lovely together.


Courtney over at Red Heads Craft More Fun created this simple Thankful sign
on burlap. It looks fantastic with the leaf and distressed frame.


I think I'm going to make one of these Thankful Chargers like
Amanda over at Every Creative Endeavor  But I might use a
$ store plate instead of the charger?


We give thanks with a grateful heart!  Hope this helps everyone ease into the Thanksgiving spirit!


Photobucket


Pin It


Related Posts Plugin for WordPress, Blogger...