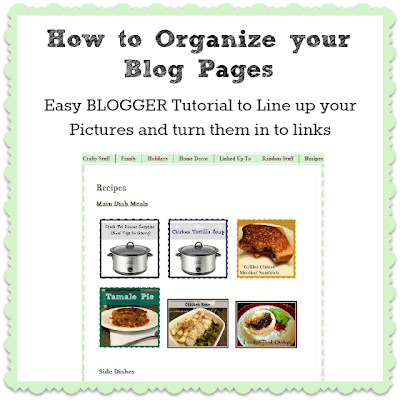
I could never figure out how to make my buttons line up so I ended up just putting them one after another on the page - like this -
While this wasn't completely horrible, I really wanted to be able to organize them by category and have the photo be a link directly back to the post. After lots of trial and error and a jump start from
Becoming Martha, I finally figured it out!!!!
Much better - don't you think? Before I get down to the step by step here are a few tips that I figured out to make this process easier. We are very new to blogging, so many of you may have already figured this out, but I thought I would share them anyway!
Tips from a Newbie
1. Set up another private blog for you to practice on. Blogger makes this very easy and it will allow you to try out all your changes and gives you time to complete them without leaving your blog in a state of disarray.
2. Always include a Square picture with a banner on your post. This will allow you to have everything all lined up neatly across the top without distorting any of your pictures. Learned this the hard way and as you will see, I didn't go back and correct all of them. The Banner just makes it easier to identify what the post is about since the pictures are rather small. I use PicMonkey to edit all my pictures and you can easily crop your pictures to a square.
Now, down to business! Here's the step by step -
Organize your Blogger Pages
1. Open your Page in one Tab and your actual blog in another -
1. Go to the actual Blog Post (click on the title so that the URL has the page title in it)
2. Right click on the picture that you want to use and select "Copy Image URL"
3. Go to the page in Blogger
4. Select HTML (Our practice/test blog is named Gus the Goat)
5. Select Insert Image
7. A box will come up and say your image has been added - select Done
8. You will then see the HTML for your picture and it will look something like this -
9. At this point you will want to highlight and delete the code in yellow - Your numbers may differ but basically you want to make sure that your remove everything from imageanchor to the width.
<a href="https://blogger.googleusercontent.com/img/b/R29vZ2xl/AVvXsEjpqheMVHWvELrns_ezGuU45VdE1YWnyDeCuV6IrczRaEMvPb5_11dzXNVJdi4XCkDo2tB6wh_pucM7E57CrqspKrGEmbDkrBj8yXEs87Ibz-UGTvKn12OQremmvTjydNcg9WyJ9_R8Shc/s320/Thanksgiving+Mantel+11.jpg"
imageanchor="1"
style=""><img border="0" height="289"
width="320"
src="https://blogger.googleusercontent.com/img/b/R29vZ2xl/AVvXsEjpqheMVHWvELrns_ezGuU45VdE1YWnyDeCuV6IrczRaEMvPb5_11dzXNVJdi4XCkDo2tB6wh_pucM7E57CrqspKrGEmbDkrBj8yXEs87Ibz-UGTvKn12OQremmvTjydNcg9WyJ9_R8Shc/s320/Thanksgiving+Mantel+11.jpg"
/></a>
<a
href="https://blogger.googleusercontent.com/img/b/R29vZ2xl/AVvXsEjpqheMVHWvELrns_ezGuU45VdE1YWnyDeCuV6IrczRaEMvPb5_11dzXNVJdi4XCkDo2tB6wh_pucM7E57CrqspKrGEmbDkrBj8yXEs87Ibz-UGTvKn12OQremmvTjydNcg9WyJ9_R8Shc/s320/Thanksgiving+Mantel+11.jpg"
target="_blank"><img
src="https://blogger.googleusercontent.com/img/b/R29vZ2xl/AVvXsEjpqheMVHWvELrns_ezGuU45VdE1YWnyDeCuV6IrczRaEMvPb5_11dzXNVJdi4XCkDo2tB6wh_pucM7E57CrqspKrGEmbDkrBj8yXEs87Ibz-UGTvKn12OQremmvTjydNcg9WyJ9_R8Shc/s320/Thanksgiving+Mantel+11.jpg"
width="180"
/></a>
<a href="https://blogger.googleusercontent.com/img/b/R29vZ2xl/AVvXsEjpqheMVHWvELrns_ezGuU45VdE1YWnyDeCuV6IrczRaEMvPb5_11dzXNVJdi4XCkDo2tB6wh_pucM7E57CrqspKrGEmbDkrBj8yXEs87Ibz-UGTvKn12OQremmvTjydNcg9WyJ9_R8Shc/s320/Thanksgiving+Mantel+11.jpg" target="_blank"><img src="https://blogger.googleusercontent.com/img/b/R29vZ2xl/AVvXsEjpqheMVHWvELrns_ezGuU45VdE1YWnyDeCuV6IrczRaEMvPb5_11dzXNVJdi4XCkDo2tB6wh_pucM7E57CrqspKrGEmbDkrBj8yXEs87Ibz-UGTvKn12OQremmvTjydNcg9WyJ9_R8Shc/s320/Thanksgiving+Mantel+11.jpg" width="180" /></a>
12. Please note that 180 is a width that works well for me and allows me to have 3 images in each row. You may have to play with this number to arrive at one that works for your blog.
14. Click to the right of the image then drag your cursor back over the image to select it. Your image will then be grayed out.
15. Select Link - when you do this the cursor will "Pop" back the right of the image. Drag back over the image to highlight it again and select Link again. Don't know why this happens but it happens every time!!!
Once you select Link for the second time you will be able to paste your web page URL into the box, Select Open in New Window, and then OK.
12. Click Publish and then go to your page to test the link. Your image should now be a link.
13. To add additional images, simply select html and start the process all over again.
Note that you shouldn't have any <br /> between your pictures or they will be on separate pages - the code will look something like this once you add your second image - You can hit return in the HTML page to add blank lines between the image code to make it easier to see, but the blank lines will not show up when you select compose because there isn't any code.
Always make sure to update your page if you are getting in and out of it and Test it often!
I hope this isn't too hard to follow. Keep in mind that we are newbies so a lot of our terms may be incorrect and this may not be the most "Correct" way to create these kind of pages, but it works for us!
Let me know if you this works for you - I hope that it will be helpful!


13. Select the Compose button and your image will appear.
14. Click to the right of the image then drag your cursor back over the image to select it. Your image will then be grayed out.
15. Select Link - when you do this the cursor will "Pop" back the right of the image. Drag back over the image to highlight it again and select Link again. Don't know why this happens but it happens every time!!!
Once you select Link for the second time you will be able to paste your web page URL into the box, Select Open in New Window, and then OK.
12. Click Publish and then go to your page to test the link. Your image should now be a link.
13. To add additional images, simply select html and start the process all over again.
Note that you shouldn't have any <br /> between your pictures or they will be on separate pages - the code will look something like this once you add your second image - You can hit return in the HTML page to add blank lines between the image code to make it easier to see, but the blank lines will not show up when you select compose because there isn't any code.
Always make sure to update your page if you are getting in and out of it and Test it often!
I hope this isn't too hard to follow. Keep in mind that we are newbies so a lot of our terms may be incorrect and this may not be the most "Correct" way to create these kind of pages, but it works for us!
Let me know if you this works for you - I hope that it will be helpful!


I really need to do it. Thanks for this tutorial!
ReplyDeleteThanks for dropping by Lena. You will have to let me know if this works for you!
DeleteI am seriously so excited you shared this I have been ready to pull out my hair trying to figure this out! sincerely thank you!!
ReplyDeleteI hope this works as well for you as it did for me. It was a lot of work but it looks so much nicer now. Let me know if works for you and thanks for dropping by.
DeleteGreat post - thanks for sharing all this know-how!
ReplyDeleteI'm your newest follower - I'd love if you'd visit me too:
www.winterpastcooking.blogspot.com
www.winterpastfinally.blogspot.com
~Peace,
LuAnne
Thanks for dropping by LuAnne! I'm your newest follower too!
DeleteThanks for sharing this tip. I pinned it to check out a little later, but I am always looking for ways to make my blog look better. Have a great 2013.
ReplyDeleteBlessings,
Nici
You will have to let me know how it works for you! Have a great weekend!
DeleteHello! Thanks so much for linking up with the Share Something Saturday Blog Hop! I'm always looking for ways to make my blog more organized - what a great tutorial!
ReplyDeleteHappy Saturday from your newest GFC follower :)
Thanks for dropping by! I'm your newest follower too! :)
DeleteGreat tutorial! Thanks! Esther Norine Designs
ReplyDeleteLet me know if it is helpful. I've already had to refer back to it! LOL!
DeleteHi Jeanette, I’m Anne from Life on the Funny Farm (http://annesfunnyfarm.blogspot.com), and I’m visiting from Clever Chicks.
ReplyDeleteWhat a great tutorial! I really need to do something about my blog hop links, and this is exactly what I've been looking for!
Anyway, thanks for posting this. If you’ve never visited yet, I hope you can pop by my blog sometime to say hi…
Thanks for dropping by Anne! I have visited your blog before and now I'm a follower! Have a great weekend.
DeleteSuch a great tip!! I'm sure it's going to be very useful to many bloggers.
ReplyDeleteThanks so much for sharing this at The DIY Dreamer.. From Dream To Reality! HAPPY NEW YEAR!! I can't wait to see what you link up this evening!
I am pinning this so I can refer back to it for my recipes tab. great tutorial!
ReplyDeleteYou will have to let me know if it works for you. I'm so glad that I put it together, since I had to refer back to it last night to add my Valentines garland on to the Holiday page! LOL!
DeleteHi! Thank you so much for sharing this awesome info at A Bouquet of Talent. I needed this. So sorry I am just now visiting, last week was just one of those weeks. :) Have a wonderful weekend.
ReplyDeleteHugs
Kathy
Thank you for your blog and organization help! I'm having trouble posting a link with my pictures...is that weird? Do you have any tips?
ReplyDeleteOh gee...I just realized my browser is not supported...that may explain it! Still thank you for your help and when I get this figured out I will try to put your button on my page....
Delete